Streamlining Your Mac’s Storage: How to Delete Partition on Mac
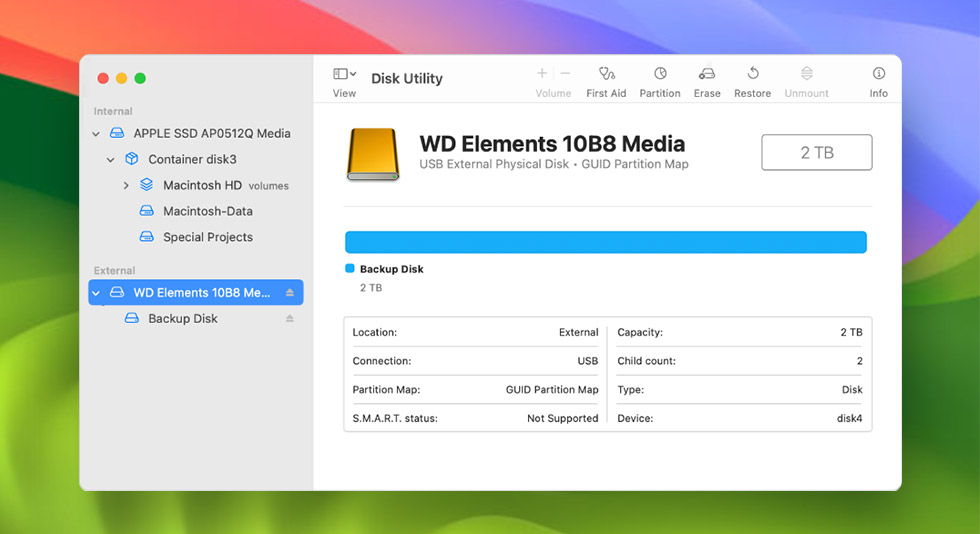
Partitioning your Mac’s hard drive can be a useful strategy for organizing and managing your data. However, there may come a time when you find the need to delete a partition. Whether you’re looking to free up space, reconfigure your storage layout, or simply streamline your system, knowing how to safely delete a partition is an essential skill for any Mac user.
In this comprehensive guide, we’ll walk you through the process of how to delete partition on Mac, ensuring that you can confidently manage your Mac’s partitions without compromising your data or system integrity.
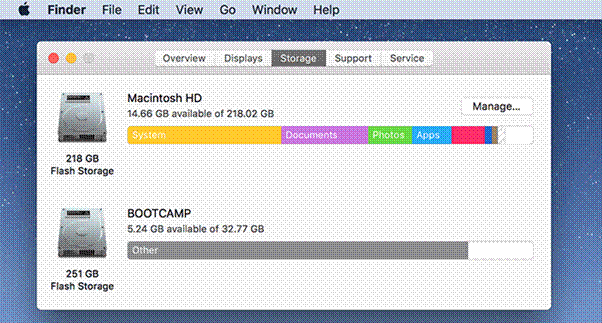
So, if you’re ready to reclaim your storage space and optimize your Mac’s performance, let’s dive into the process of deleting a partition on your Mac.
What is a Disk Partition on macOS?
A disk partition on macOS is like a virtual section of your hard drive. It’s a way to divide your storage space into separate areas, each acting like its own independent drive. This allows you to organize and manage your data more efficiently.
For example, you might have one partition for your operating system and another for your personal files. Understanding disk partitions can help you optimize storage and improve overall system performance on your Mac.
Also Read: How to Delete Other Storage on Mac: Quickly Recover Storage Space
Why is it Important to Partition Hard Drives on Mac?
Partitioning hard drives on a Mac is important for several reasons. Firstly, it helps organize and segregate data, making it easier to manage files and applications. Additionally, it allows for different file systems on the same drive, facilitating compatibility with various operating systems.
Partitioning can also enhance system performance by isolating system files from user files. In the event of a system issue, it enables targeted troubleshooting and prevents one partition’s problems from affecting others. Overall, partitioning is a valuable tool for optimizing storage and improving overall Mac efficiency.
How to Create a New Disk Partition on Mac?
Before we learn how to delete partition on macOS, here’s a brief guide on creating a new one. Need to organize your Mac’s storage or set up a new partition for specific tasks? Follow these steps to create a new disk partition on your Mac with ease.
Prior to making any alterations to your disk, make sure you’ve created a thorough backup of your crucial files. This precautionary step is crucial to safeguard against potential data loss.
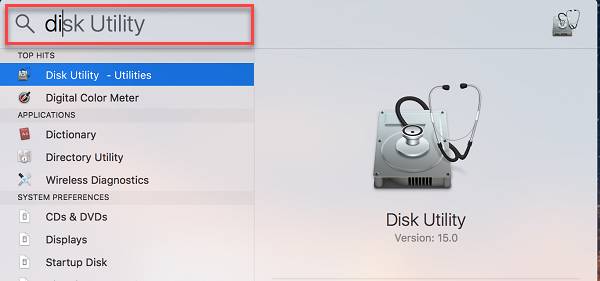
Step 1: Go to “Applications” > “Utilities” > “Disk Utility.” In the left sidebar, choose the disk you want to partition.
Step 2: Click the “+” button below the partition layout. Drag the divider between the partitions to allocate the desired size.
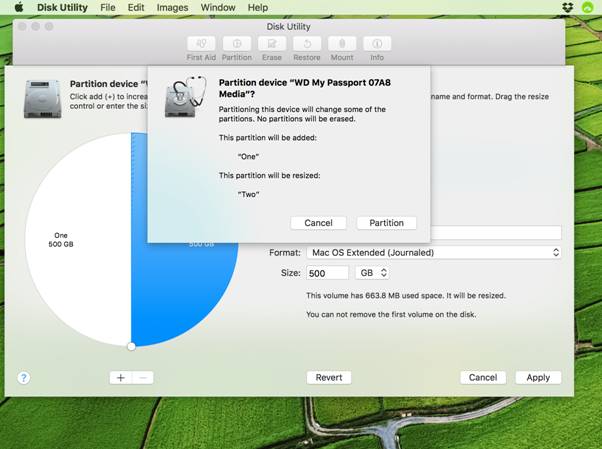
Step 3: Enter a name for the new partition. Choose a file system format (usually APFS or Mac OS Extended).
Step 4: Click “Apply” and then “Partition” to confirm your choices.
Step 5: The partitioning process might take some time, depending on the size of the disk and the speed of your Mac. Once completed, you’ll see the new partition appear on your desktop.
Remember to exercise caution during this process, and always back up your data before making any changes to your disk partitions.
Also Read: How to Check Storage on Mac | Free up Disk Space on Mac
How to Delete Partition on Mac: A Step-by-Step Guide!
If your Mac’s storage device is divided into multiple partitions and you wish to remove them, Disk Utility offers a straightforward solution. Deleting a partition allows you to reclaim storage space, which can then be reallocated to extend an existing partition.
In situations where you’ve installed Windows through BootCamp on your Mac, a dedicated partition would have been created for the Windows operating system. Should you decide to remove Windows from your Mac, this method will enable you to entirely delete that partition.
Method 1: Use Disk Utility
Here are the steps to delete a partition using Disk Utility on macOS:
Step 1: Go to “Applications” > “Utilities” > “Disk Utility.” In the left sidebar, choose the disk that contains the partition you want to delete.
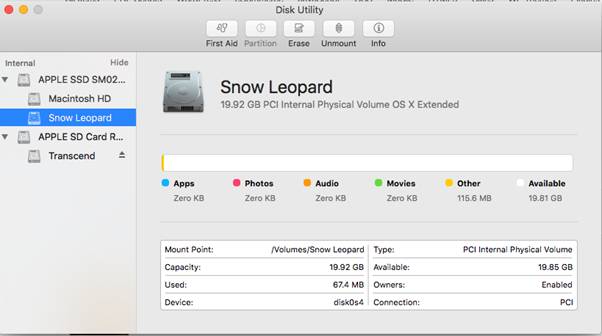
Step 2: In the partition layout, click on the partition you wish to remove. Below the partition layout, click the “-” button. This will remove the selected partition.
Step 3: A confirmation prompt will appear. Click “Remove” to confirm.
Step 4: Click “Apply” and then “Partition” to implement the changes.
Once completed, the partition will be removed, and you’ll see the updated disk configuration.
Remember, this process permanently deletes the selected partition and all its contents. Be certain that you have backed up any important data before proceeding.
Also Read: Best Disk Space Analyzers for Mac
Method 2: Use Terminal to Delete Partition on Mac
While Disk Utility is generally effective for partition management, there are instances where it might struggle to erase a partition. This is crucial because the partition must be wiped clean before it can be entirely removed from the disk, potentially causing a roadblock.
Thankfully, there’s an alternative solution. You have the option to erase a specific partition directly through the command line in Terminal. Once done, you can then utilize Disk Utility to complete the process of removing the partition altogether.
If you want to remove partition on Mac using Terminal, follow these steps:
Step 1: Open Terminal on Mac. You can find Terminal in the “Utilities” folder within “Applications.”
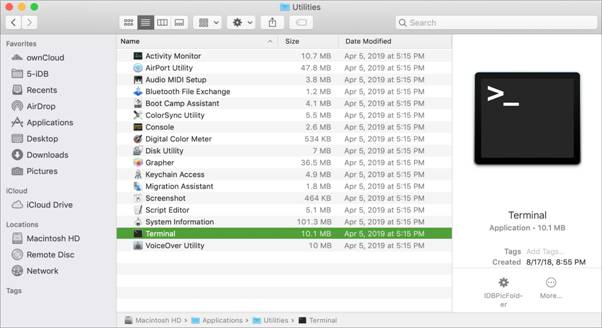
Step 2: Use the diskutil list command to list all disks and partitions. Identify the disk and partition you want to delete.
Step 3: Use this command to clear the partition. Just replace the last part with your disk identifier:
diskutil eraseVolume jhfs+ drive /dev/<your_disk_identifier>
Step 4: Terminal will ask for your admin password. Enter it and press Enter.
Step 5: Run the diskutil list again to verify that the partition has been removed.
And that’s it! Here’s how to delete partition on Mac using Terminal. Make sure you’ve identified the correct disk and partition before executing any commands, as mistakes can lead to data loss. If you’re unsure, seek professional advice or consult with someone experienced in using Terminal.
Also Read: Best Disk Repair Software For Mac
Conclusion
Understanding how to delete partition on Mac is a valuable skill for maintaining an organized and efficient storage system. Whether you’re creating partitions for specific purposes or removing them to free up space, the methods outlined in this guide, both through Disk Utility and Terminal, provide you with the tools to take charge of your Mac’s storage. Remember to exercise caution and back up your data before making significant changes.
With these techniques in hand, you can confidently and effectively optimize your Mac’s storage to suit your needs.

 How to Increase Download Speed on Mac
 Best Free Lightroom Alternatives for Mac in 2024
 How to Save MacBook Battery Life