How To Delete Photos From Mac But Not iCloud

Have you ever wondered, “Can I delete photos from my Mac but keep them on iCloud?” Well, many Mac users use iCloud Photo Library to sync images across devices. The photos you take on your iPhone automatically appear on your Mac, and vice versa. However, over time you may notice your Mac’s hard drive filling up with photos despite having enough iCloud storage.
In this article, we’ll show you how to delete photos from MacBook but not iCloud while discovering quick tips and hacks to do this job like a pro.
Let’s dive in!
Also read: How To Remove Metadata From Photos on Mac : Protect Your Privacy
How iCloud Photo Library Works

When you enable iCloud Photo Library, it uploads the existing photos on your devices and stores them in the cloud. Going forward, any new photos you take are automatically uploaded and can be accessed on all your logged-in devices. This means you can view, download, and manage your entire photo library from your Mac, iPhone, iPad, and other devices while saving local storage space.
However, the downside is that all these photos are automatically stored on your Mac’s hard drive by default. So, even if you have lots of space in iCloud, your Mac’s local storage can fill up quickly.
Also read: Best Ways To Organize Photos on Mac : Streamline Your Mac’s Photo Library
Will Deleting Photos From Mac Delete From iCloud?
Yes, if you have iCloud Photo Library enabled, deleting photos from your Mac will also remove them from iCloud storage. This synchronization works s both ways – actions taken on one device affect the photos on your other linked devices as well.
So if you wish to delete some photos & free up space on your Mac but keep them saved and in the cloud, it is best not to permanently delete images directly. Instead, use the selective removal techniques covered in this article. These methods allow deleting locally stored photos from the hard drive only while keeping your entire iCloud photo archive intact and accessible across other gadgets.
Carefully managing your device photo storage in this manner helps avoid the risk of losing any images you may want later.
Also read: How To Transfer Photos From iPhone to Mac
How to Delete Photos From MacBook But Not iCloud?
Wondering how to remove photos from Mac? Well, thankfully, there is a selective way to remove photos from your Mac, while keeping them stored in iCloud.
Step 1: Make Sure iCloud Photo Library is Enabled
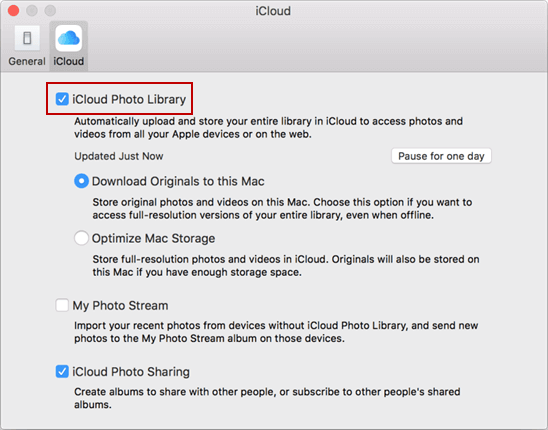
First, open the Photos app on your Mac and make sure iCloud Photo Library is enabled. To check, go to Photos > Preferences > iCloud. Make sure the option for “iCloud Photo Library” is checked. If not, check this option and allow your photos to finish uploading to iCloud before proceeding.

Step 2: Select the Photos You Want to Remove from Your Mac
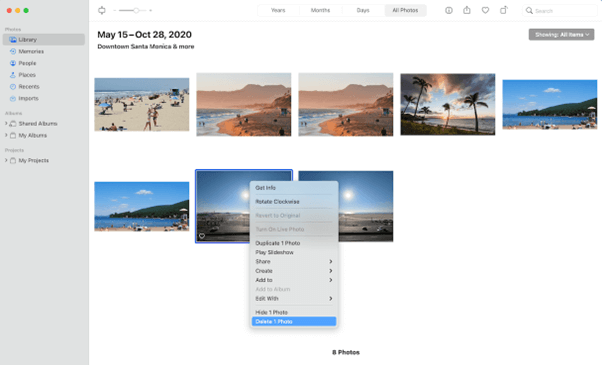
For this, open the Photos library on your Mac and browse to find photos you want to delete locally. You can manually select individual photos or groups of photos. Or filter things like recently imported photos over a certain timeframe.
As you select photos to remove, the image will have a small cloud download icon in the bottom corner. This means they are only stored in iCloud and will be removed from this Mac.
Step 3: Delete the Photos From Your Mac
Now that your photos are selected to be removed from your Mac, go to Image > Delete Photos. The next prompt will specify that the selected photos will be deleted from this Mac, but not from iCloud Photo Library in the cloud or your other devices. Confirm by clicking Delete Photos.

Step 4: Confirm The Delete Action From the Recently Deleted Folder
The photos you selected for removing locally will move to the “Recently Deleted folder” on your Mac. This serves as another confirmation before you permanently remove the photo l from your Mac’s storage. If you change your mind, you can retrieve photos from the respective place.
Here’s how to delete photos on Mac without removing them from iCloud. But once confirmed, the selected photos are only a click away in iCloud when accessed from other devices while freeing up valuable disk space on your Mac. After an additional 30 days, the images will be permanently deleted from the Recently Deleted folder as well.
Also read: Duplicate Photo Fixer Pro – Best App To Find and Delete Duplicate Photos
Other Ways to Remove Photos from Mac Only
In addition to manually selecting images to delete from your Mac but not iCloud, there are a few other approaches:

- Set an automatic period for keeping photos stored locally under Photos preferences. For example, you could set photos to be deleted from your Mac after 90 days.
- Filter your entire photo library to a certain timeframe, like the last month. Then select all and delete from Mac. This lets you easily remove your whole recent photo history while keeping your entire iCloud photo archive available in the cloud.
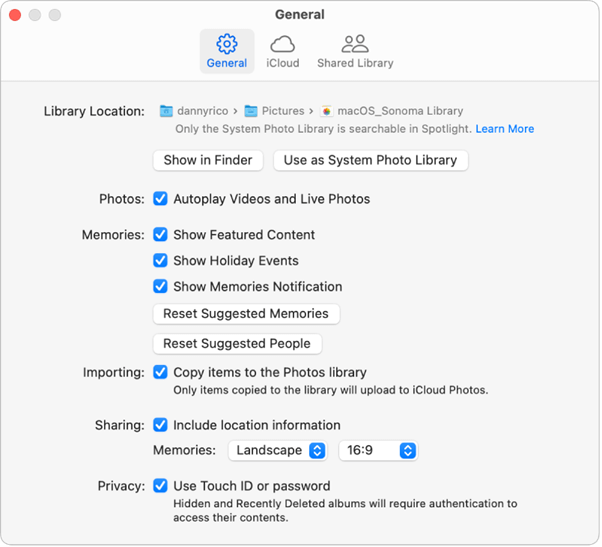
- Use the Storage Management section under Photos preferences. This shows how much space photos and videos take up locally. You can then sort and mass delete those consuming the most room.
Pro Tips When Removing Photos from Your Mac
Follow these pro tips when selectively deleting images from your Mac only:
- Double-check that iCloud Photo Library is up to date across devices before deleting it locally. This ensures no images are accidentally lost.
- Remember, that any editing or adjustments made to photos apply universally when using iCloud Photo Library. So don’t worry about losing edits when removing from one device.
- Be aware that permanently deleting photos locally from Recently Deleted can’t be undone. So retrieve anything here first if you change your mind.
- Deleting the photos locally means they won’t appear visually in the Photos app on that device. But they can still be accessed from All Photos via search or filters.
- You can re-download any photos deleted locally back to your Mac from iCloud whenever needed. So feel free to create more space as necessary.
Conclusion | Tips For Deleting Photos From Your Mac Without Losing Them In iCloud
This wraps up our guide on how to delete photos from Mac but not iCloud. Thanks to iCloud Photo Library synchronization, it’s easy to manage Mac photo storage selectively without risking losing access to anything. Following the steps outlined here, you can safely remove photos from your Mac that are also stored in the cloud.
Just remember to double-check that your library is fully updated first. Managing local device storage doesn’t mean sacrificing a backed-up iCloud photo archive.
