Best Ways To Delete Temp Files On Mac
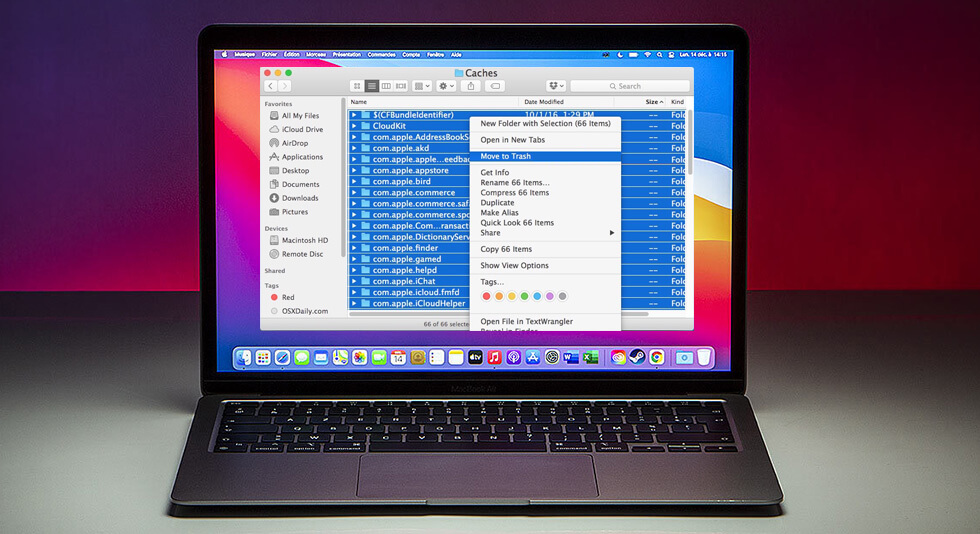
Going by the title, you may be wondering – why delete temporary files on Mac? Or does Mac even has temporary files. Let’s begin by answering the latter question, yes! Mac does accumulate temporary files in the form of web browser cache, app temp files and folders, messaging cache, log files, crash reports, and so on. You may not even realize that these take up a considerable amount of space on your Mac, and if not dealt with quickly, these files can even impact your Mac’s performance.
What Do Temporary Files Do on Mac? And, Why Should You Remove Temp Files On Mac?
Temporary files store files when a program runs on Mac. It can be used to restore data if any information is lost on your computer. Let’s quickly jot down some reasons you should check your Mac for temporary files –
- For better Mac performance.
- To free up hard drive space often overloaded with temp files.
- Sometimes, temp files may get corrupted and cause your computer to malfunction.
Best Ways To Delete Temp Files On Mac
1. Restart Your Mac

One of the safest and probably the best ways to delete temporary files on a Mac is to restart your Mac or let it go through the shutdown cycle. By doing this, temporary files, cache, and cookies are automatically removed without any hassle. To Restart your Mac, click on the Apple icon and Restart.
2. Use A Third-Party Cleanup Tool
One of the best ways to clear temporary files on a Mac is to use a third-party cleaning tool for Mac like Cleanup My System.
What is Cleanup My System?
Cleanup My System is a professional grade tuneup tool with the help of which you can easily get rid of temporary files, junk files, large and old files, and unwanted mail attachments in one click. By removing unwanted clutter from your Mac, you can increase its storage and improve its performance. Let’s see how it can be done!
How Can Cleanup My System Help Removing Temp Files On Mac?
1. Download, run, and install Cleanup My System
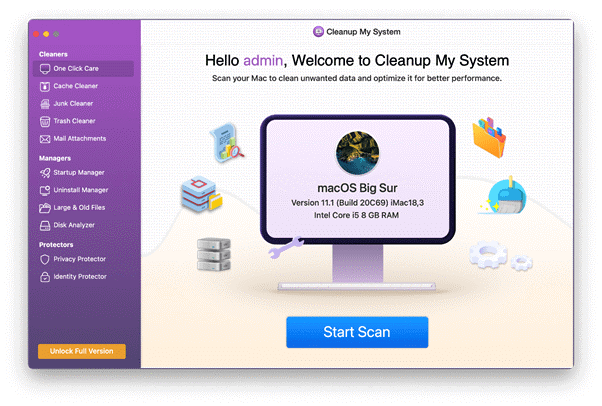
Get Cleanup My System
2. From the left-hand side, click on Cache Cleaner
3. Click on the Start Scan button.

4. As soon as useless files appear, select the ones you want to eliminate.
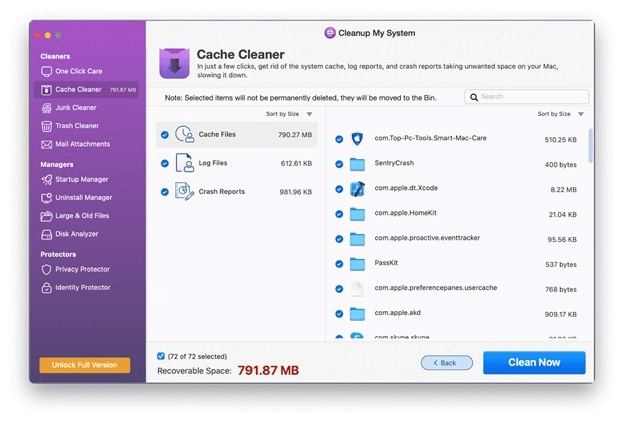
5. Click on the Clean Now button from the bottom-right corner of the screen, and all the items will be removed safely.
To know more about this wonderful cleanup utility for Mac, you can check out this inside-out review of Cleanup My System.
3. Clear Temporary Files on Mac Using The Finder.
You can remove temp files from your Mac manually using the Finder. However, it is important that you pay attention, as deleting the wrong files may cause your Mac to malfunction. We advise you to create a backup of files before deleting anything. Here is how you can clear temporary files on your Mac using the Finder –
1. Quit all apps that are opened on your Mac.
2. Go to the Finder menu.
3. Press CMD + Shift + G to head to the Go To Folder.
4. In the dialog box, type: ~/Library/Caches.
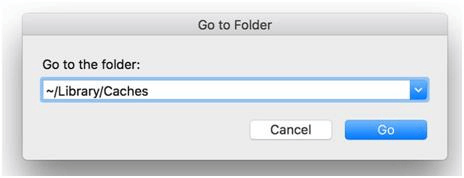
5. Press CMD + A to select all the items.
6. You can now drag the selection towards the Trash Folder.
4. Delete Browser Cache
Browser cache, in a way, is good as it helps your browser run faster when you are trying to load a web page that you have already visited before. In most cases, your browser itself is sufficient to clear out this cache, but what if you have fallen victim to adware or, worse, malware! This is where you will have to remove the cache manually. Here, also you can take the aid of a third-party cleaning tool like Cleanup My System. But, if you want to clear your browser cache manually, here are the steps for the same. Let’s assume that you use Safari as your primary browser. To clear Safari cache –
1. Open Safari Preferences.
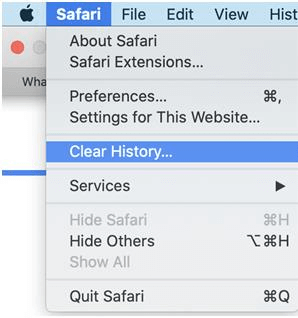
2. Click on the Advanced tab
3. Check the box next to the Show Develop menu
4. Click on the Develop menu
5. Choose Empty Caches
Wrapping Up
Hope you have found the above methods of clearing temporary files on mac useful. We’d again like to reinstate that if you are a beginner, you should use a third-party cleaner like Cleanup My System to clean temp files on Mac since then you won’t risk losing any critical data. Found this post useful? If yes, share this post with your fellow Mac users and for more such updates, keep reading BestMacCleaner.


 How to Recover Deleted Data Files on Mac
 How to Delete System Log Files on Your Mac
 How To Show Hidden Files On MacOS
 How To Empty The Trash On A Mac And Securely Delete Your Files
 How to Hide or Unhide Files Using Terminal on Mac