How To Forget Wi-Fi Network on Mac
When it comes to pinning down the benefits offered by WiFi, the list is endless. WiFi has become a crucial part of our day-to-day lives and helps us to get things done at our fingertips. As we have become more and more reliant on technology, WiFi helps in connecting with our surrounding devices and gadgets, be it our phone, tablet, laptop, or smart home appliances. Whether personal or professional, WiFi is helping us in every sphere to be more productive.
So, just like any other device, your Macs also get empowered by WiFi networks. But is your Mac automatically getting connected to nearby WiFi networks? Well, yes, Macs have a tendency to auto-join networks but it can hamper your workflow.
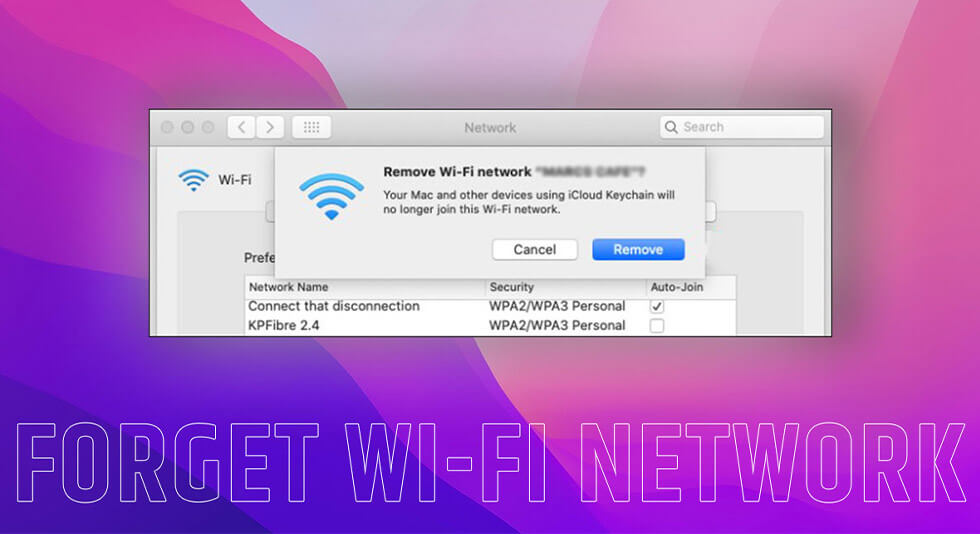
If you don’t want your Mac to join a specific network, you can do so by deleting or forgetting the WiFi network. It is an easy solution to deal with this problem. In this post, we will be learning about how to forget the WiFi network on Mac.
Let’s get started.
Also read: Best WiFi Analyzer Apps For Mac in 2022 [Free/Paid]
How to Forget a Network on Mac?
The process of deleting or forgetting previously saved WiFi networks on macOS is incredibly simple.
But rather than deleting a WiFi network and all its details, it is recommended that you change the network priority instead. In this way, your Mac will automatically connect to nearby networks based on priority. Let’s learn how you can set a WiFi network priority on macOS.
Edit Network Priorities on Mac
1. Tap on the Apple icon placed on the top menu bar and select “System Preferences”.
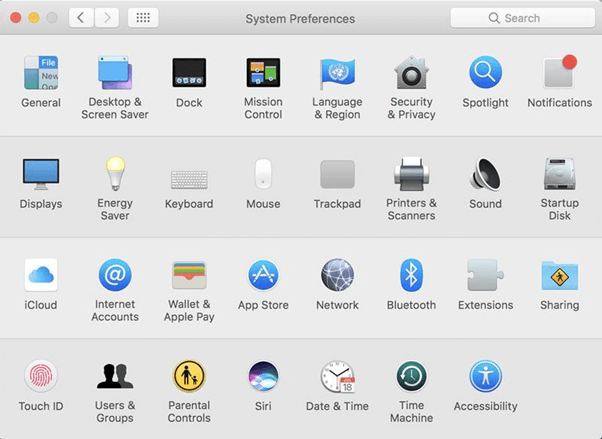
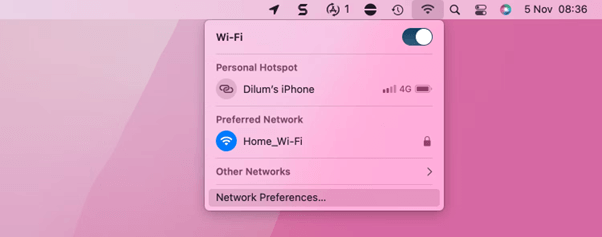
2. Select “Network”. Alternatively, you can also tap on the WiFi icon and select “Network Preferences”.
3. The Network Preferences window will now appear on the screen. Select “WiFi” from the left sidebar.
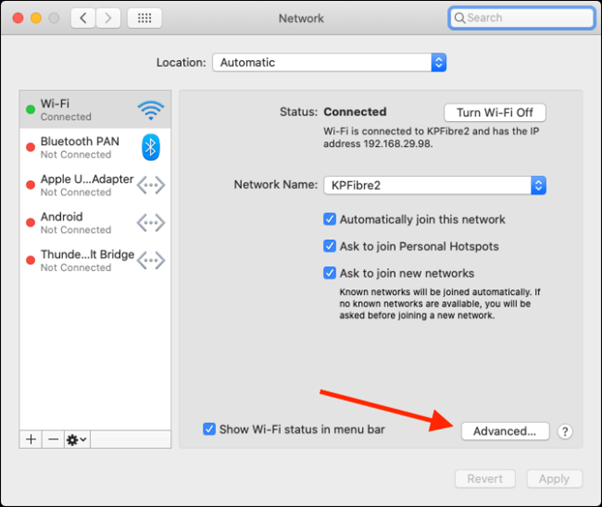
4. Tap on the “Advanced” button placed at the bottom.
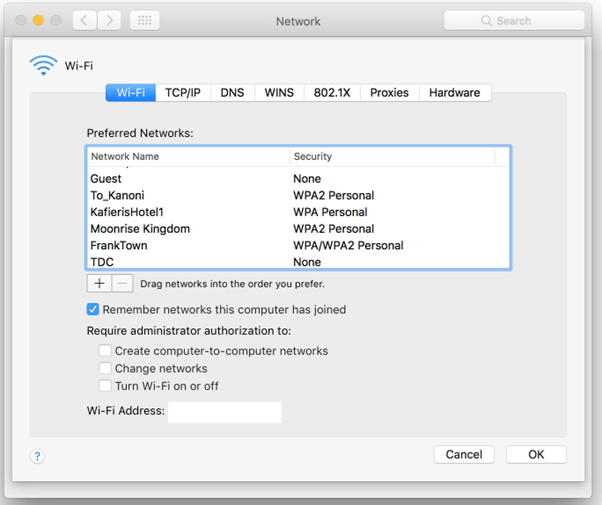
5. Here you will see a list of previously connected and nearby WiFi networks. Drag and drop the saved WiFi networks to set a priority as per your preference.
6. Hit on the OK button to save changes.
Also read: 10 Best Notepad++ Alternatives for Mac
How to Disable Auto-join for WiFi Networks on Mac?
1. If you don’t want your Mac to connect to a specific WiFi network automatically, here’s what you can try.
2. Open the Network Preferences on Mac. Switch to the WiFi category from the left menu pane and then tap on “Advanced”.
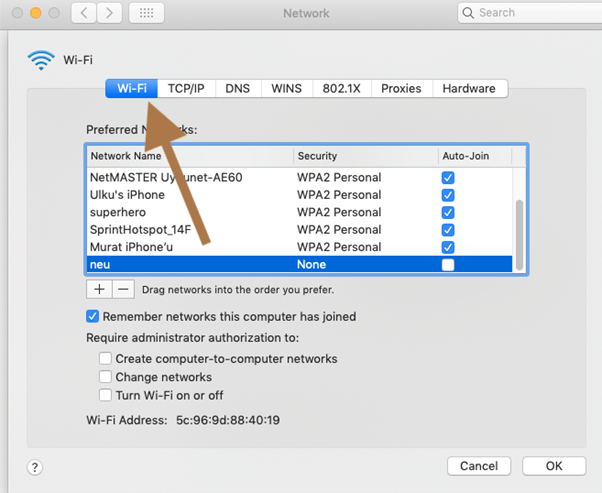
3. Now, uncheck the “Auto-join” icon placed next to the WiFi network to disable your device from connecting to it automatically.
How to Delete or Forget a WiFi Network on Mac?
To entirely delete a WiFi network and all its related settings including the saved password, follow these quick steps:
Tap on the WiFi icon placed on the top menu bar and select “Network Preferences”. Switch to the WiFi category from the sidebar and then tap on “Advanced”.
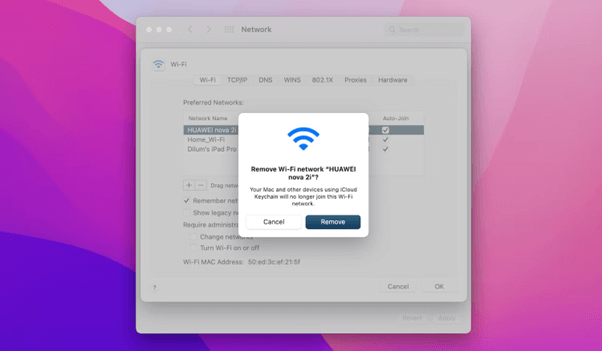
Under the “Preferred Networks” section, select the WiFi network that you need to delete and then tap on the “Minus” icon. This is how you can forget WiFi networks on Mac to tackle the problem of auto-connecting.
Why Stop your Mac from Auto-Joining WiFi Networks?
You may feel the urge to cut down a certain WiFi network, especially while working in public places like cafes, Airports, libraries, and so on. Your Mac may auto-connect to nearby public hotspots and cause an annoyance. Hence, if you are pretty sure about a specific WiFi network that you longer want your Mac to connect to, you can refer to the above-listed guide that will help you delete or forget a WiFi network.
Also read: How To Fix Wi-Fi Issues On macOS Ventura
Conclusion
This wraps up our step-by-step guide on how to forget the WiFi network on Mac. Deleting a WiFi network will also delete its saved password and you would have to re-enter the credentials to connect again. So, rather than deleting or forgetting a WiFi network, first, try to change the network priority and check if it helped in resolving the issue.
Was this post helpful? Feel free to share your thoughts in the comments section!

 Movavi Photo Editor Review for Mac – 2024
 PDFelement Express For Mac Review | All-in-one PDF Editor Software
 Photos Exif Editor: Best Tool To Change EXIF Data Of Captured Images
 10 Best PDF Editor For Mac In 2024 – [Free & Paid]