Mac Disk Cleanup Guide 101: How To Free Disk Space On Mac?
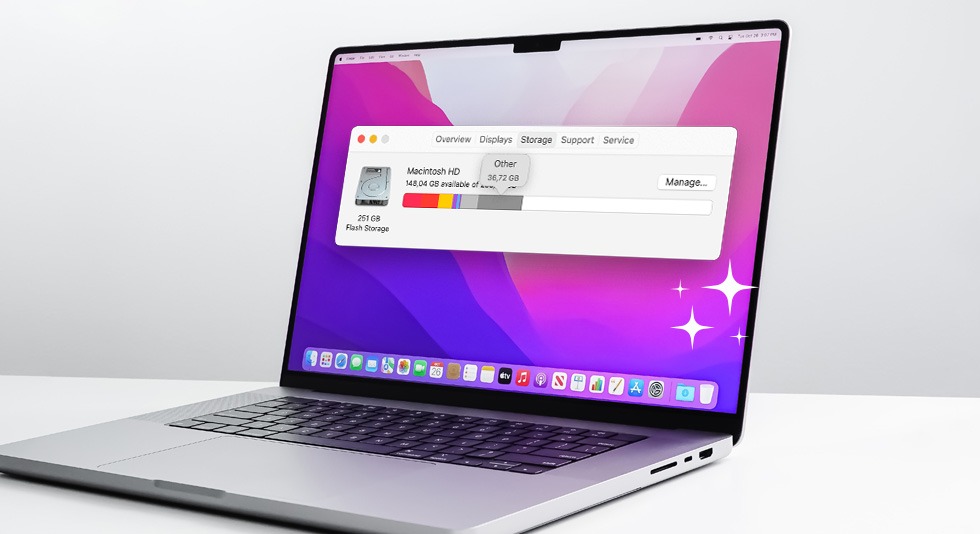
Never Run Out Of Storage Space On Your Mac Again. Learn How To Clean Up Mac Storage?
Is your Mac slowing down? Are you getting the “Your Startup Disk Is Almost Full” message? If you’ve been using your Mac for a long time now, you might have come to a point where your machine is completely packed up with tons of files and programs. This huge amount of data not only hogs your memory but also slows down the machine to an extent that you might end up searching for “How To Free Up Space On MacBook Air?”.

First Check: What’s Taking Space On Your Mac?
Well, before you go on deleting the junk files and other unwanted apps and files, it’s good to check your storage space. To do so, simply follow the instructions shared below:
STEP 1 = Hit the Apple icon, located at the top-left corner of the screen and choose the option About this Mac from the drop-down menu.

STEP 2 = On the next window, you need to click on the Storage option and see what’s taking up space on your Mac. As soon as you click on the same, you can hover over the different sections to see which files and categories are hogging space on your machine.

You can hit the Manage button to get effective recommendations from Apple to clean up your Mac. Additionally, you can try implementing the following workarounds to free disk space on the machine.
6 Manual Ways: How To Clear Disk Space On A Mac?
One of the easiest ways to get rid of “Your Startup Disk Is Almost Full” pop-up and make your system run faster than ever before, you should consider free up space on Mac, by following the measures below.
METHOD 1 = Clean Up Browser Cache
If you are a heavy browser user (like I am), your device’s storage tends to get packed up with browser caches, cookies, and other temporary files. That’s why you regularly clear browser caches must free up space on Mac.
For Safari Browser Users:
- Hit the Safari button, located at the top-left corner of the screen.
- Select Preference from the drop-down menu.
- From the next window, navigate to the Advanced tab.
- Now, check the box next to ‘Show Develop menu in menu bar’ & close the Window.
- From the Develop drop-down, choose the Empty Caches option.
For Google Chrome Users:
- Launch Chrome and hit the three-dot icon, located at the top-right corner of the screen.
- Select More Tools option and click on Clear browsing data.
- Now, simply select the time range to clear unwanted browser caches, cookies & other browsing data.
- That’s it! Hit the Clear data button to free up storage space on Mac!
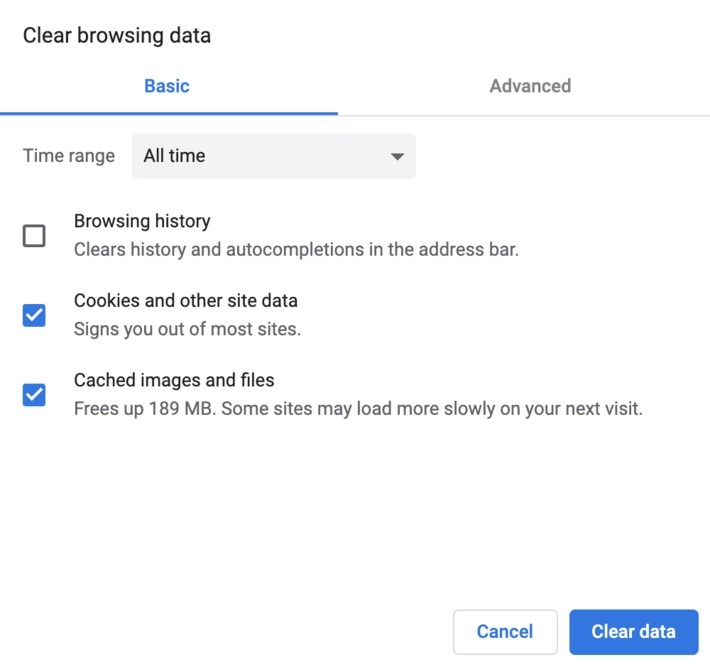
This is probably one of the easiest ways when it comes to ‘How to Free Disk Space On Mac?”. You can go ahead and follow more workarounds if needed.
METHOD 2 = Empty Trash Items
Moving the unneeded files to the Trash item is certainly not enough. You need to make sure that you empty the Trash folder often to permanently delete files. That’s why we recommend setting your trash to get empty automatically after 30 days of duration. To do so, all you need to do is:
STEP 1 = Hit the Apple icon, located at the top-left corner of the screen and choose the option About this Mac from the drop-down menu.
STEP 2 = Navigate to the Storage tab and go to Manage and then look at “Recommendation”, located at the left pane.
STEP 3 = Click on the Empty Trash Automatically button to set your preferences.
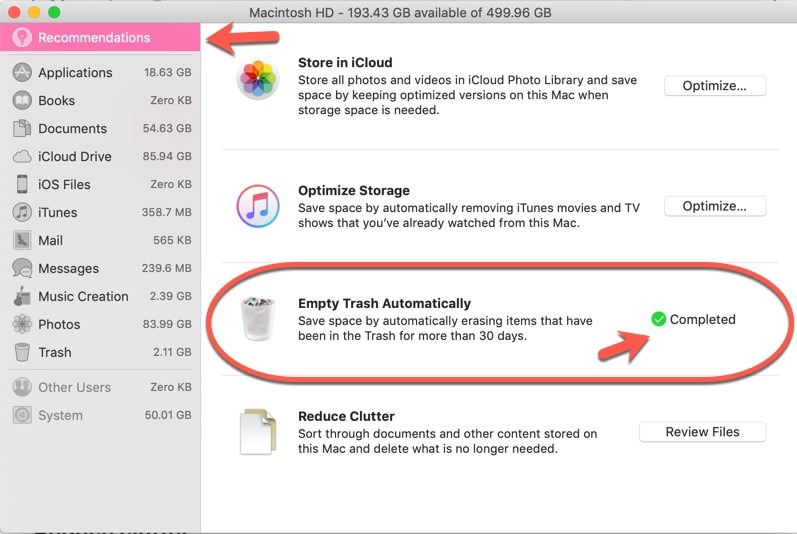
Move ahead to the next method to learn how to clear disk space on Mac without putting in much effort.
METHOD 3 = Remove Logs
Your Mac stores another type of temporary file – Logs that are responsible for decluttering storage on your machine. To remove unwanted system logs, apps, and more, here’s what you need to do:
STEP 1 = Launch the Finder app and hit Go – Go to Folder.
STEP 2 = From the Go to the Folder pop-up box, simply type ~/Library/Logs and hit the Go button!

STEP 3 = From the next window, locate files with .log file extension, right-click on them and select the Move to Trash or Move to Bin button.
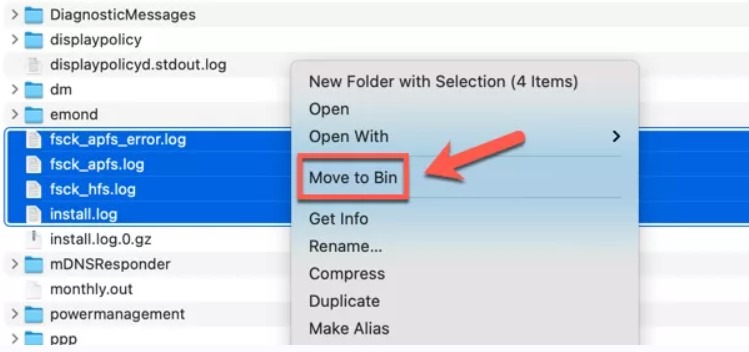
These unwanted log files will be moved to the Trash folder. Make sure you consider emptying the Trash folder as well so that no residuals get accumulated over time.
METHOD 4 = Uninstall Old & Needles Mac Applications
Over time, your machine may have a variety of unused Mac software and applications, which you probably don’t use every day. Hence, if you wish to save a significant amount of storage space and free up space on Mac, consider uninstalling these Mac programs by following the steps below:
STEP 1 = Launch the Finder app and navigate to the Applications tab.
STEP 2 = Now click on the four horizontal lines icon located at the top of the screen. You can refer to the screenshot provided below to get a clearer idea.
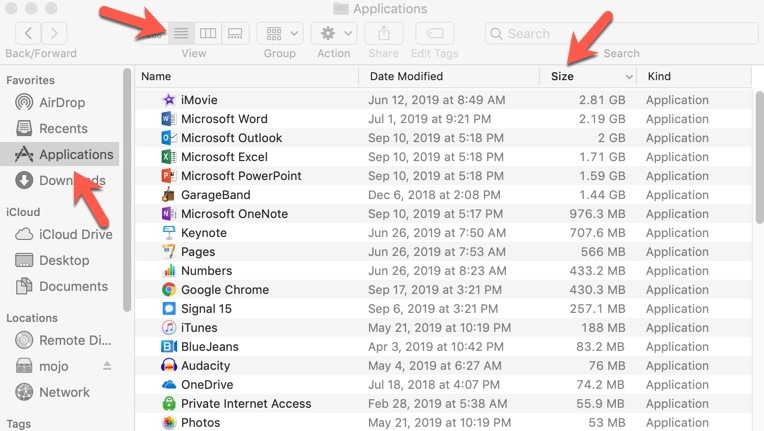
Now simply sort the applications by hitting the Size button. Doing so will help you check the large apps and the ones you don’t even use. Start uninstalling them by dragging the app icon to the Trash folder. Also, do not forget to empty the Trash folder later to completely free up space!
METHOD 5 = Find And Remove Duplicate Files
One of the trickiest things that can eat up a lot of storage space on your Mac, includes Duplicate and similar-looking files. Searching for them manually is certainly a complicated and time-consuming process, hence we advise you to take the help of a dedicated duplicate finder and cleaner software for Mac. Those nifty applications are certainly of great help and come equipped with advanced scanning engines to get rid of duplicate images, videos, music files, documents, archives, and other multimedia data.
In case, you don’t wish to install a third-party duplicate cleaning utility, you can follow the steps below to clean duplicates in the Music Library. (The method is only for cleaning clone music files.)
STEP 1 = Launch the Music app on your Mac.
STEP 2 = Head towards the Menu and click on the File tab.
STEP 3 = Now select the Library option from the drop-down menu and hit the Option (Alt) key. Here you need to choose the option – Show Exact Duplicate Items.
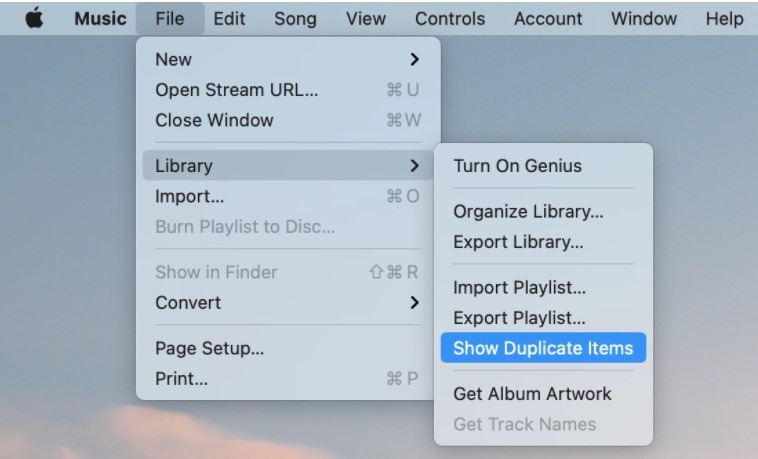
That’s it! Now you will see a list of duplicate music files under the Music Application.
METHOD 6 = Get Rid Of Old Backups
Well, in the event of system failure, having a backup can be a life savior. However, Macs can archive files from your iOS and other smartphones. Hence, having tons of old backup files can eat lots of storage space on your Mac. Therefore, it is important to access and delete these unwanted old backups by following the instructions shared below:
STEP 1 = Hit the Apple icon, located at the top-left corner of the screen and choose the option About this Mac from the drop-down menu.
STEP 2 = Navigate to the Storage tab and hit the Manager button, as shown in the screenshot provided below.

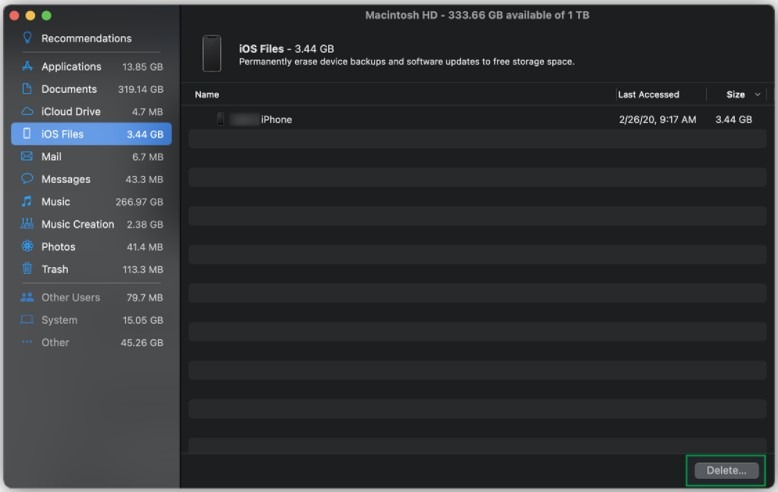
STEP 3 = Now navigate to the Recommendations section, click on iOS Files.
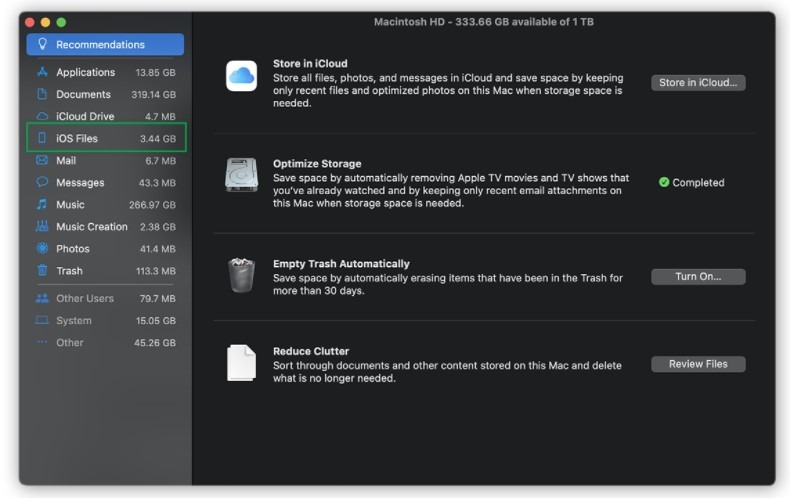
STEP 4 = Now a list of all the iOS Files will appear in the right-side window, select and click on the Delete button!
Hope you found this “How To Clear Up Space On Mac?” guide useful via Manual Methods.
Most Recommended Way: How To Free Up Space On Mac?
If the manual workarounds sound tedious to you and you wish to clean up Mac Storage in a few clicks, we recommend you to take the help of a reliable and trustworthy Mac Cleaning & Optimization utility like Disk Clean Pro. It’s an effective application that thoroughly examines your Mac and lists out all the potential junk files, logs, partial downloads, duplicates, old/unused files, large files, and more that may occupy a significant amount of storage and hamper overall performance.
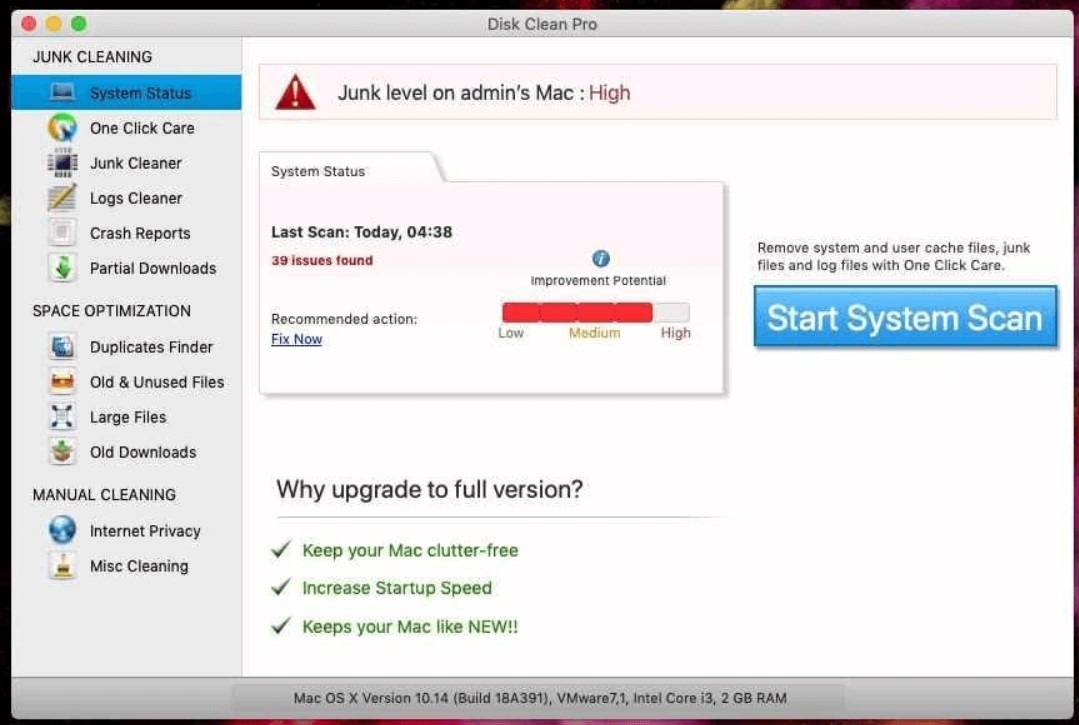
The application comes with a One-Click Care that allows users to instantly find and clean system cache, log files, trash, unfinished downloaded files, and so on.
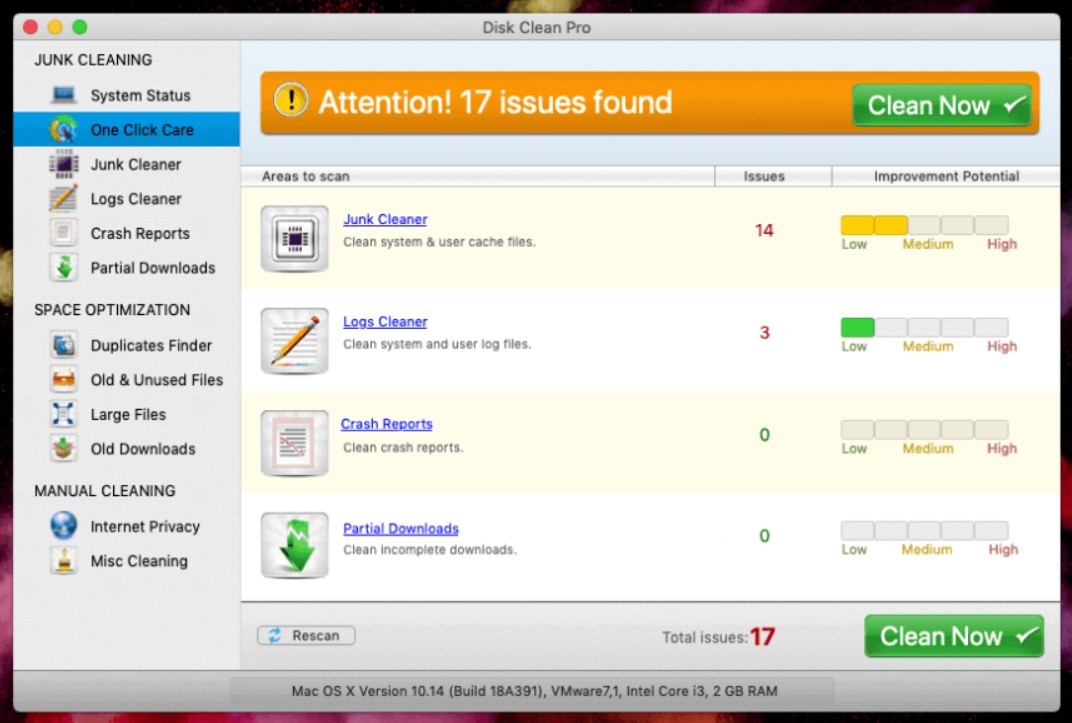
You will certainly notice a significant performance boost after each scan using Disk Clean Pro. What’s more? Apart from valuable cleaning and optimization utilities, the software also provides useful Privacy tools that help users to protect their browsing data from being embezzled. You can run a quick scan with the Internet Privacy module, which would help you find and clean browsing data like Internet History, Download History, Cookies, and more to keep your privacy intact.
Read This- Review: Disk Clean Pro Is The One-Stop Solution For Your Mac Cleanups
How To Clear Disk Space On A Mac Using Disk Clean Pro?
To use this Mac Cleaning & Optimization Software, you need to follow the steps below:
STEP 1 = Install Disk Clean Pro using the Download button provided below.
STEP 2 = Launch the Mac Cleaner and hit the Start System Scan button.
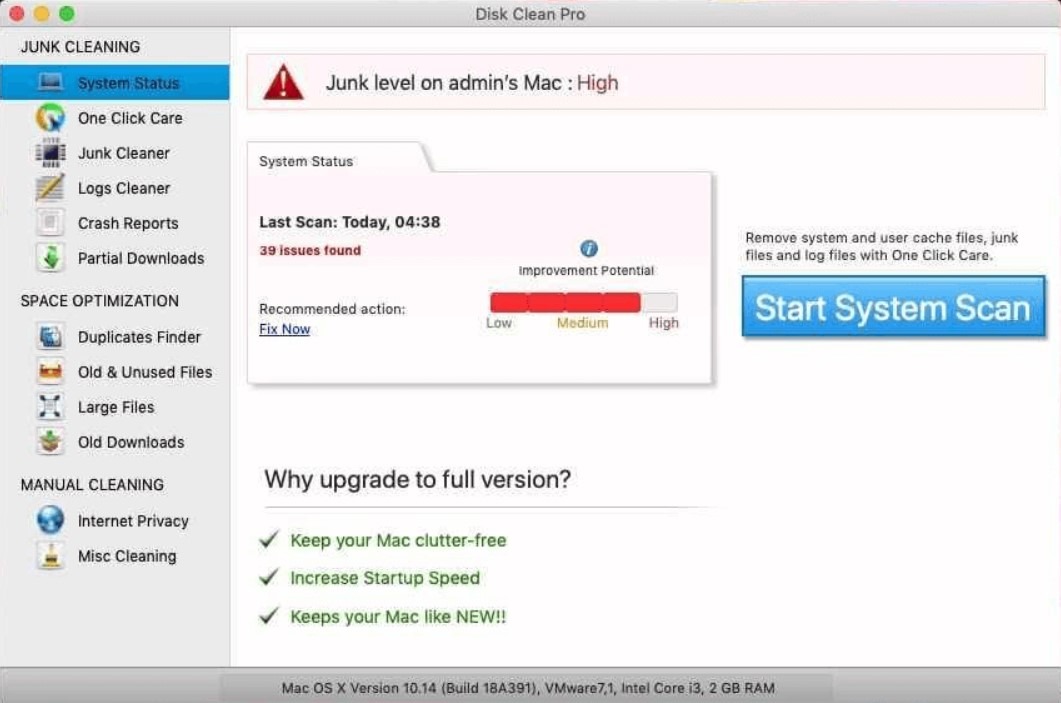
STEP 3 = Keep patience and let Disk Clean Pro detect all the potential junk files and unwanted residues that may hamper performance.
STEP 4 = As soon as the scanning process gets completed. A list of all the space-hogging files, apps, and items will appear on your screen. You can quickly go through it and hit the Clean Now button to get rid of these space-wasters in no time.
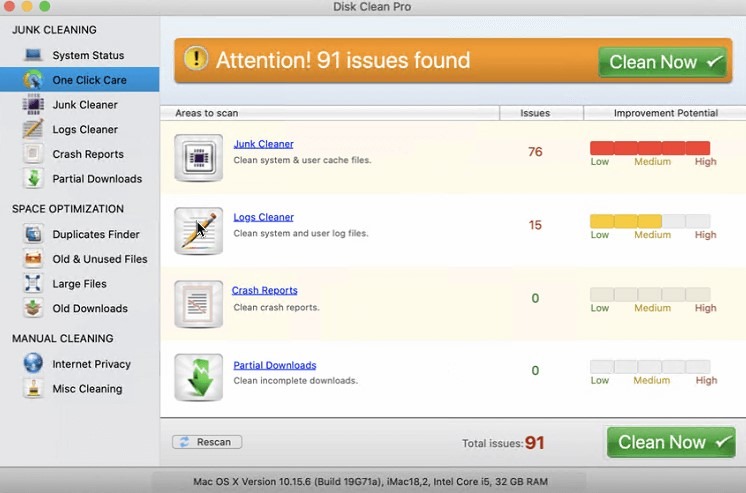
Get ready to witness a significant performance boost using Disk Clean Pro!
Bottom Line: The Best Way On How To Clear Up Space On Mac?
Using a dedicated Cleaning & Optimization Software for Mac is certainly the best bet to clear disk space on Mac. However, if you are still looking for more ways to reclaim more storage space? Here’s a set of additional things you can execute: Clean mail attachments, Delete partial download files, Remove extra languages, Compress large files, Consider using a Cloud Storage Platform. etc.


 10 Best Duplicate File Finders for Mac In 2024
 Best Browser For Mac in 2024: Fastest & Lightest
 Best App Uninstaller For Mac In 2024
 Best Mac Hard Drive Clone Software In 2024
 10 Best Mac Temperature Monitor Apps In 2024