How To Transfer Files From Mac to Mac

Data is an extremely important asset in today’s digital age. With the proliferation of technology, businesses, and individuals generate a vast amount of data every day to gain valuable insights, make better decisions, and drive innovation. But when it comes to transferring data from one device to another, we all feel a little edgy. Isn’t it?
If you’re wondering how to transfer files from one Mac device to another Mac? You’ve come to the right place. In this post, we have listed several methods that you can use to migrate files from one MacBook to another one in a safe and reliable way.
|
Before we begin…
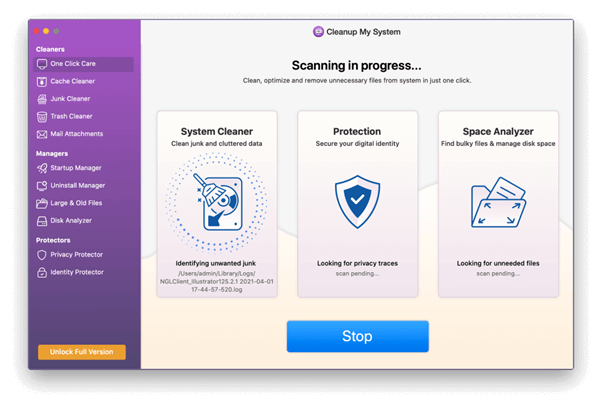
Are you annoyed with your Mac’s slow and sluggish performance? Well, we have an app for you that can help you restore system speed, improve productivity, free up storage space & get the best performance from your Mac. Download and install the Cleanup My System app from the Mac App Store to fine-tune your device’s performance in just a few clicks. It is a professional cleanup tool that will help you in removing unused files, junk data, large email attachments & other redundant files to free up storage space on your MacBook. Get Cleanup My System |
How to Transfer Files from Mac to Mac?
There are multiple ways to transfer data from one Mac to another Mac. Some of the most common methods include:
- Migration Assistant: This is a built-in utility on macOS that allows you to transfer files, settings, and other data from one Mac to another. You can connect the two Macs using a Thunderbolt, FireWire, or Ethernet cable, or over a Wi-Fi network.
- AirDrop: If both Macs are connected to the same Wi-Fi network, you can use AirDrop to wirelessly transfer files between them.
- External hard drive: You can also transfer data between Macs using an external hard drive. Simply copy the files you want to move on an external hard drive, connect it to the other Mac, and paste the files to your second Mac.
- Cloud storage: If you use Cloud services like iCloud, Dropbox, or Google Drive, you can upload your files to the cloud and download them onto the other Mac.
That’s it! You can choose any of these methods that work best for you based on the amount of data you need to transfer and your preferences for speed, convenience, and security.
Let’s discuss each of these methods in detail!
Also read: How To Use iMac as Monitor In 2023
Method 1: Migration Assistant
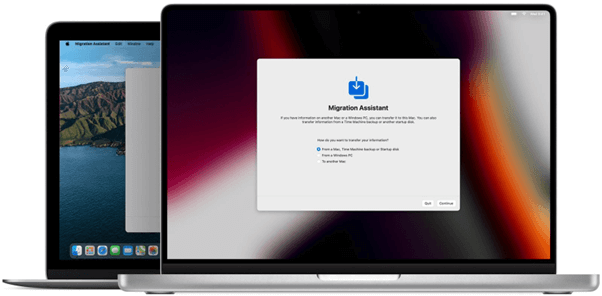
Migration Assistant is a built-in utility on macOS that simplifies the process of transferring data from one Mac to another Mac. It allows users to effortlessly transfer data, settings, and other files from an old Mac to a new one.
How to Use Migration Assistant on Mac?
Here are the steps to use Migration Assistant Mac to transfer data and other important files
STEP 1 = First, power on both Macs and make sure they are connected to the same network.
On Your Mac (Where files will be transferred):
- Open the Applications folder and then open the Utilities folder.
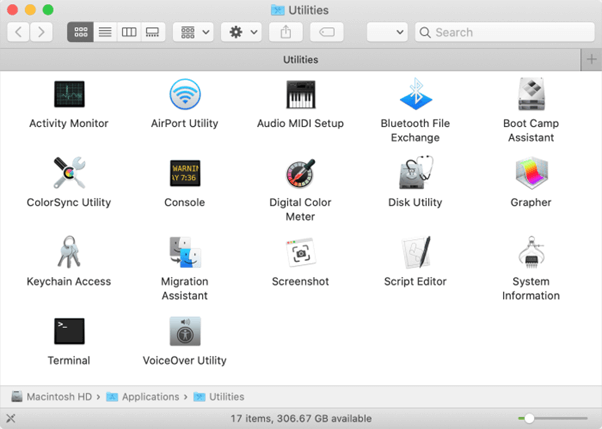
- Launch Migration Assistant.
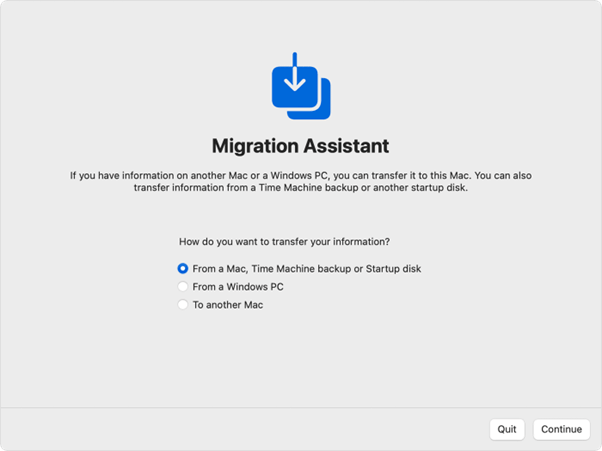
- Choose the option “From a Mac, Time Machine backup or startup disk” and then click Continue.
On Mac (Where files are originally stored):
- On this Mac, open Migration Assistant (Like you did previously).
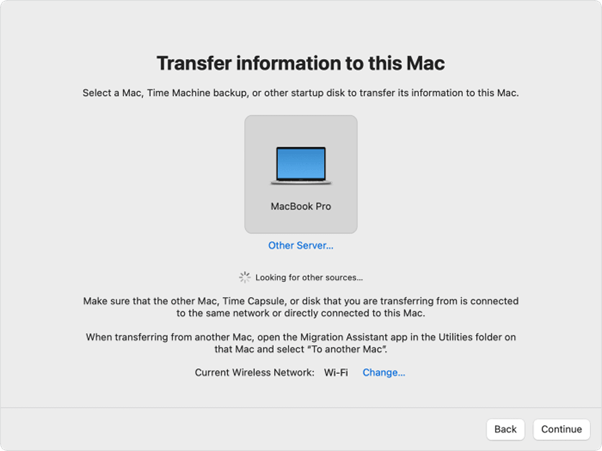
- Choose the option “To another Mac” and then click Continue.
- On the second Mac, select the first Mac from the list of available sources and then click Continue.
- Enter the password for the old Mac when prompted.
- Select the data and settings you want to transfer and then click Continue.
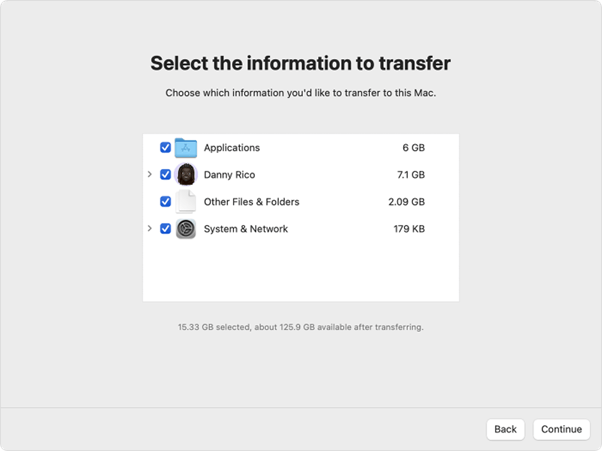
Follow the on-screen instructions and wait for the transfer process to get completed. The total time it takes depends on the amount of data you are transferring. Once the transfer is complete, you can log in to your new Mac and access your transferred files and settings.
That’s it! By following these steps, you can use Migration Assistant to transfer files from Mac to Mac.
Also read: How to Access and Control Mac Remotely For Any Device
Method 2: AirDrop
As long as both MacBooks are connected to the same WiFi network, you can also use AirDrop to quickly transfer your data between Macs. Here’s what you need to do:
- First, enable AirDrop on both devices.
- Open the Finder window and select the files you want to transfer.
- Tap on the ‘Share’ button placed on the toolbar to start sharing files.
- Tap on the Share menu and select “AirDrop”.
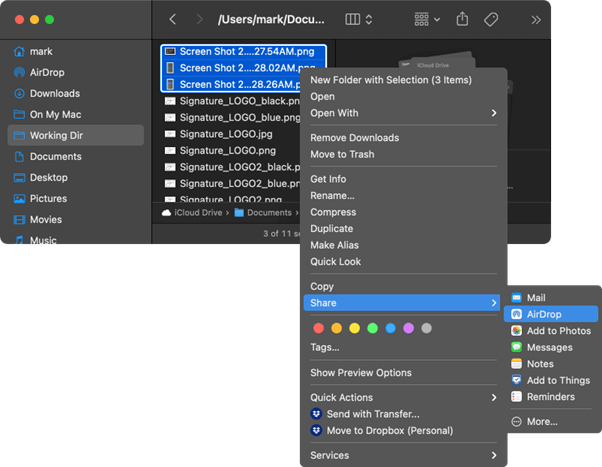
- In the AirDrop window, select the other Mac to which you need to transfer your files.
- On the other Mac, a prompt will appear asking if you want to accept the transfer. Click on “Accept” to start the data migration process.
- Wait for the transfer to complete. The time it takes to transfer data, depends on the size of the files being transferred and the speed of the Wi-Fi network.
Once the transfer is complete, the files will be saved on the other Mac in the Downloads folder.
Method 3: External Hard Drive
Yes, you can even use an external hard drive to transfer data from one Mac to another, especially if you’re dealing with large-sized files. Follow these quick steps to get started:
- Connect an external hard drive to the Mac where files are stored.
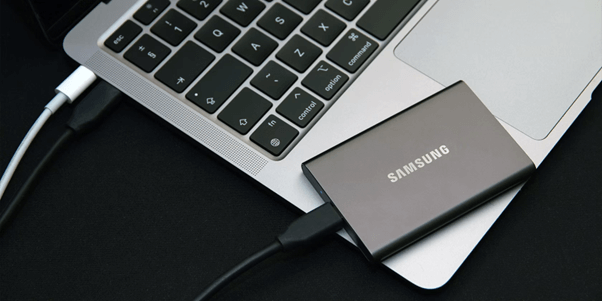
- Copy the files to the external hard drive.
- Safely eject the external hard drive from the first Mac.
- Connect the external hard drive to the second Mac and open the external hard drive on the second Mac.
- You can either drag and drop the files from the external hard drive to the second Mac or use the copy-paste keyboard shortcuts.
- Safely eject the external hard drive from the second Mac.
And that’s it! This method allows you to transfer files between two Macs using an external hard drive.
Method 4: Cloud Storage
Using a cloud storage service like iCloud, Google Drive, or DropBox can allow you to easily transfer data from Mac to Mac. Here’s what you need to do:
- Sign in to the cloud storage service on the first Mac.
- Upload the files you want to transfer to the cloud storage service. This can be done by dragging and dropping the files into the cloud storage service window.
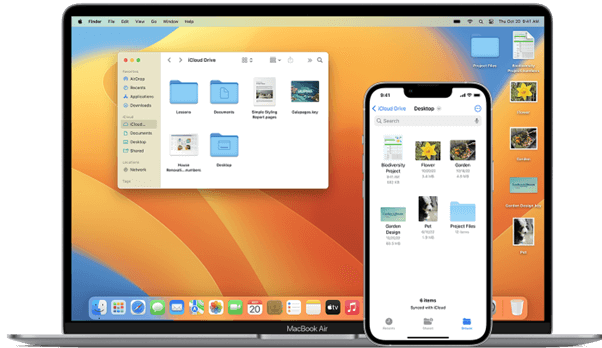
- Keep patience and let the uploading process get completed.
- Sign in to the same cloud storage account on the second Mac.
- Download the files you uploaded from the cloud storage service to the second Mac. You can simply drag and drop the files from the cloud storage service window to the desired location on the second Mac.
- Let all the files get downloaded properly to the second Mac and that’s it!
Also read: How To Delete An iCloud Account
The Final Word
This wraps up our guide on how to transfer files from Mac to Mac using various methods. You can use any of the above-listed workarounds to securely share your important files from one Mac to another.
Was this post helpful? Feel free to share your thoughts in the comments box!


 How to Access and Control Mac Remotely For Any Device
 How To Transfer Photos From iPhone to Mac
 Best Mac Hard Drive Clone Software In 2024
 How to Factory Reset Your Mac?