How to Make a WiFi Hotspot on your Mac

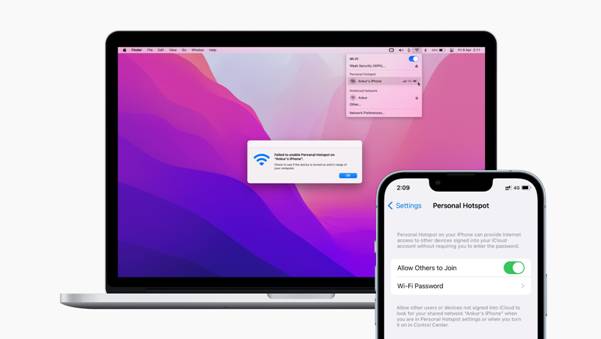
Staying connected is essential. Isn’t it? And having access to the internet wherever you go has become a necessity. Whether you’re working remotely, traveling, or simply need to share your internet connection with others, turning your Mac into a WiFi hotspot can be a lifesaver. With the Mac hotspot feature, you can transform your MacBook or iMac into a portable wireless access point, allowing other devices to connect to the internet through your Mac’s internet connection.
Creating a hotspot on your Mac is a straightforward process, and in this article, we’ll guide you through the steps to turn your MacBook into a hotspot.
We’ll cover everything from understanding what a WiFi hotspot is to setting it up on your Mac, along with additional tips and frequently asked questions to help you make the most of this convenient feature.
Also read: Best WiFi Analyzer Apps For Mac
What is a WiFi Hotspot?
Before we learn how to create hotspot on Mac, let’s gather a little understanding of the topic. A WiFi hotspot is a wireless access point that creates a localized network, allowing other devices to connect to the internet through the hotspot’s internet connection. In the case of a Mac hotspot or Macbook hotspot, your Mac acts as the wireless access point, sharing its internet connection with other devices within range.
WiFi hotspots are incredibly useful when you need to connect multiple devices to the internet but don’t have access to a traditional wireless network. For example, if you’re working remotely in a cafe or a park, you can create a hotspot on your Mac and connect your laptop, tablet, or smartphone to the internet through your Mac’s internet connection.
There are two main types of WiFi hotspots:
- Public Hotspots: These are hotspots provided by businesses, such as hotels, airports, coffee shops, and other public places. They typically require a password or subscription to access.
- Personal Hotspots: These are hotspots created by individuals using their own devices, such as smartphones, tablets, or laptops (like a Macbook hotspot). Personal hotspots allow you to share your internet connection with other devices you own or with friends and colleagues.
Also read: How To Forget Wi-Fi Network on Mac
How to Create a Hotspot on Your Mac
Apple has made it easy to set up and manage hotspot on Mac. Here are the detailed steps to enable hotspot on MacBook:
Step 1: Check Your Internet Connection
Before you can create a hotspot on your Mac, you need to ensure that your Mac is connected to the internet. This could be through an Ethernet connection, a WiFi network, or even a cellular data connection if you have a compatible Mac with a built-in cellular modem.
Step 2: Open the Sharing Preference Pane
Click on the Apple menu in the top-left corner of your screen and select “System Settings” In the System Preferences window, switch to the “General” tab and click on the “Sharing” icon.
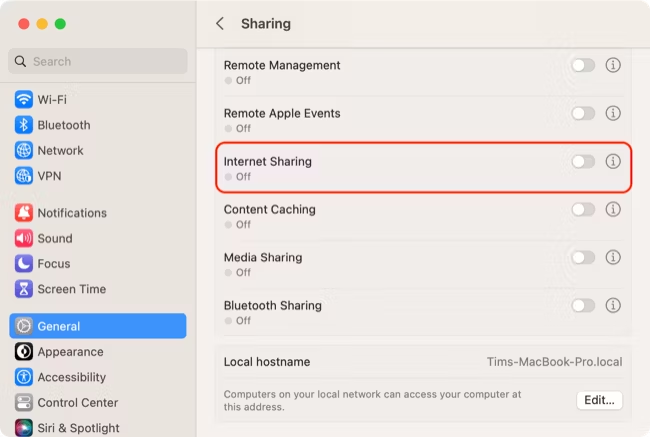
Step 3: Enable Internet Sharing
In the Sharing preference pane, enable the “Internet Sharing” feature on Mac.
Step 4: Select the Internet Connection to Share
In the “Share your connection from” dropdown menu, select the internet connection you want to share. This could be your Ethernet, WiFi, or cellular data connection.
Step 5: Choose How to Share Your Internet Connection
In the “To computers using” section, select the option to share your internet connection over WiFi. If you want to give your hotspot a specific name, you can enter it in the “Computer Name” field.
Step 6: Configure Security Settings (Optional)
If you want to secure your hotspot and prevent unauthorized access, you can click on the “WiFi Options” button and set a password for your hotspot. You can also choose the type of security you want to use, such as WPA2 Personal or WPA3 Personal.
Step 7: Start Internet Sharing
Once you’ve configured the settings, click on the “Internet Sharing” checkbox again to start sharing your internet connection. Your Mac will now become a WiFi hotspot, and other devices can connect to it using the name and password (if set) you provided.
Also read: How to Remove Search Baron To Enhance Your Privacy, Speed & Overall Mac Experience
Additional Tips for Using WiFi Hotspot on Mac
While creating a hotspot on your Mac is relatively straightforward, there are a few additional tips and considerations to keep in mind:
- Battery Life: Turning your Mac into a hotspot can drain your battery faster than normal usage. It’s a good idea to keep your Mac plugged in or have a backup battery pack handy when using the hotspot feature for extended periods.
- Internet Speed: The speed of your hotspot will depend on the speed of your Mac’s internet connection. If you’re sharing a slower connection, the speed will be further reduced when multiple devices are connected to the hotspot.
- Limit Connections: To ensure optimal performance, you can limit the number of devices that can connect to your hotspot. This can be done by clicking on the “WiFi Options” button and adjusting the “Maximum clients” setting.
- Disable When Not in Use: Remember to disable the hotspot feature when you’re not using it. Leaving it enabled can drain your battery and potentially expose your Mac to security risks.
- Use a VPN: If you’re concerned about security or privacy when using a public hotspot, consider using a virtual private network (VPN) to encrypt your internet traffic.
- Update Software: Make sure to keep your Mac’s software up to date, as Apple often releases updates that improve the hotspot feature and address any security vulnerabilities.
Also read: What To Do If Your Mac Doesn’t Recognize iPhone: 8 Solutions!
Conclusion
Creating a WiFi hotspot on your Mac is a convenient way to stay connected and share your internet connection with other devices. By following the steps outlined in this article, you can easily turn your Macbook into a hotspot and enjoy internet access wherever you go.
With a few additional tips and considerations, you can easily turn MacBook into hotspot to optimize your experience.
FAQs:
Q1: Can I use my Mac’s hotspot feature with any internet connection?
Yes, you can use the hotspot feature with any internet connection available on your Mac, including Ethernet, WiFi, and cellular data connections (if your Mac supports it).
Q2: Is there a limit to the number of devices I can connect to my Mac’s hotspot?
While there is no hard limit set by Apple, the number of devices you can connect to your hotspot will depend on your Mac’s hardware capabilities and the speed of your internet connection. Generally, it’s recommended to limit the number of connected devices to ensure optimal performance.
Q3: Does creating a hotspot on my Mac consume a lot of battery?
Yes, using the hotspot feature can drain your Mac’s battery faster than normal usage. It’s advisable to keep your Mac plugged in or have a backup battery pack handy when using the hotspot for extended periods.
Q4: Can I secure my Mac’s hotspot with a password?
Yes, you can set a password for your hotspot by clicking on the “WiFi Options” button and entering a password in the “Password” field. This will prevent unauthorized access to your hotspot.
 How to Reset or Change Your Mac Password
 How To Find WiFi Password on Mac?
 Best WiFi Analyzer Apps For Mac in 2024 [Free/Paid]
 10 Best Download Managers For Mac In 2024